
Chile Verde Recipe Updated: All Fresh Ingredients
Thrackerzog very much treats cooking as a hobby. He’s joked that it’s in some ways an unfortunate one because he can’t sell his chicken cacciatore on etsy. He came up with an initial recipe that included a few of non-fresh ingredients in canned or pre-packaged form, and won the chili cookoff in his office using that recipe. But since the end of 2011, our recipe has had a few revisions and is now completely fresh (with the obvious exception of some seasonings). We’re happy to share out delicious cooking if only digitally, so I’m updating that recipe to reflect the more fresh construction. I’m giving proportions based on the pounds of pork purchased, so it’s a highly scalable recipe. (The last time we made it, we used 8 pounds of pork and used a giant stockpot to start cooking down the sauce.)
This recipe is one of the most delicious things we do in the kitchen. It’s also incredibly time-intensive and we only do it a few times a year. But oh, is it worth it.
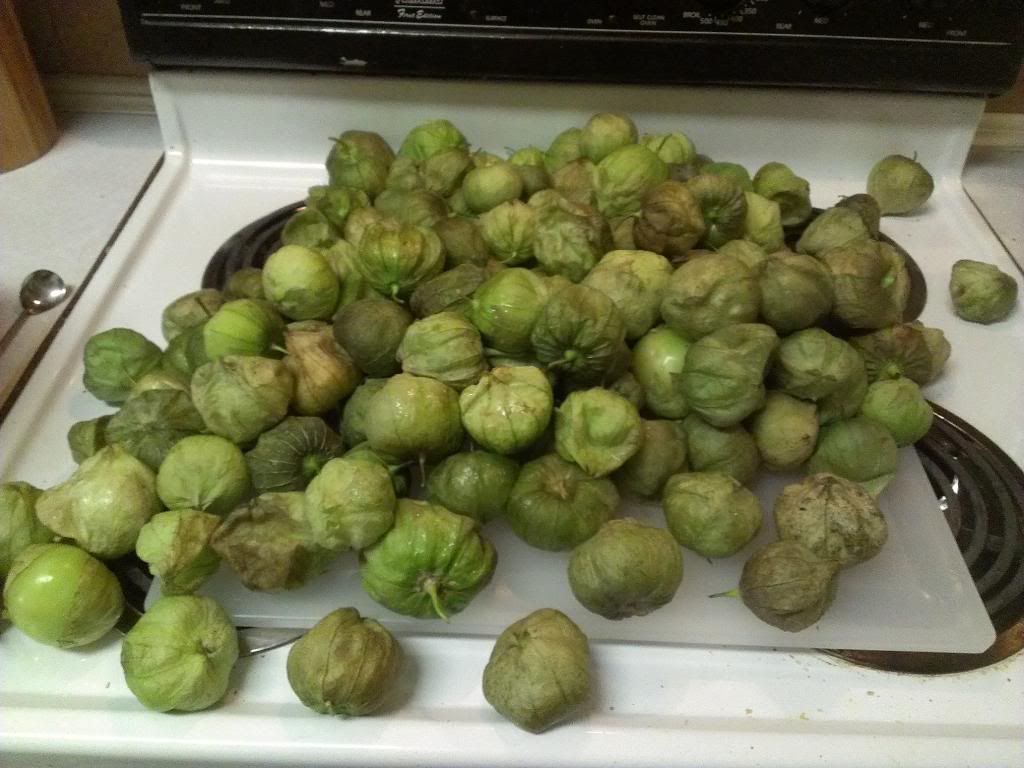
The ingredients:
- The amount of tomatillos you want will vary based on how large a pork roast you’re planning on cooking. Buy at least twice as many pounds of tomatillos as pork. You can use a small amount for just a couple people or cook for a bunch.

- Poblano chiles. For the proportion on these, plan on halving the pounds of tomatillos and using that number of poblanos and anaheims each. Obviously adjust to taste for spiciness and flavor. (Some supermarkets label these “pasillas” rather than poblanos, but that’s wrong. Pasilla is the dried form of a chilaca, rather like how dried poblanos are called ancho chiles.)

- An equal number of anaheim chiles to poblanos. (Again, this is adjustable according to taste)
- A yellow onion for approximately every 5 pounds of pork

I Don’t Make Quiche
It took adulthood for me to realize that while I make something I grew up calling “quiche,” it doesn’t really fit the normal meaning.
For one thing, quiche has a crust like a pie and none of the ingredients include Bisquick, ordinary or homemade. For another, all quiche recipes call for a lot more milk than I seem to use. But more than anything else is the fact that the texture of quiche does not remotely resemble the light fluffiness I get from my usual what-leftovers-do-I-have egg dish.
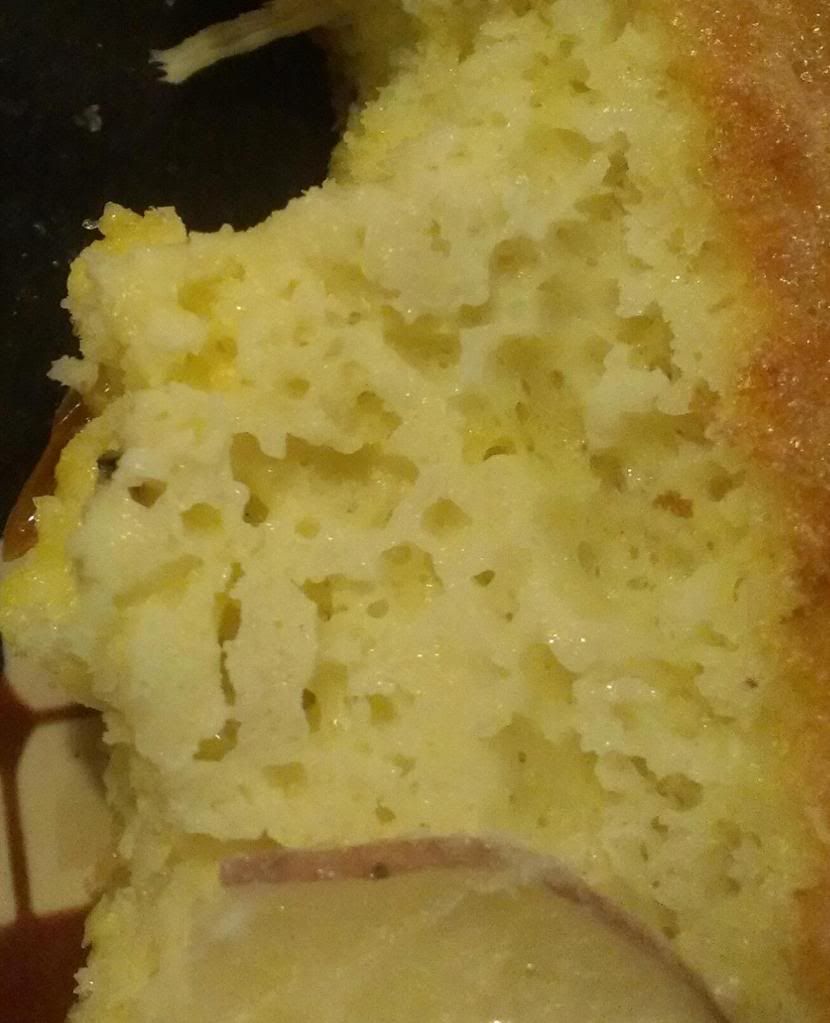
Basically if quiche could be called egg pie, I think I make egg cake. But it’s nummy and I figured I’d share.
Ingredients
- Some Bisquick (purchased or homemade)
- Homemade bisquick proportions are: 2 cups flour, 1 tablespoon baking powder, 1 teaspoon salt and 1/3 cup shortening. Obviously scale as needed. I think I usually use a cup or so in a quiche, but it’s always a bit fuzzy
- Things you want to bake with eggs; I usually like things like ham, mushrooms, broccoli, but really I’ve used all sorts of stuff
- Cheese, if you want it
- Around 1/2 cup of milk. I use 2%
- Enough eggs that they look like enough volume to cover your ingredients in the baking dish.
Preparation
Preheat your oven to 350° and make sure you grease your baking dish/pie plate with Pam or something. Put your filling items in the baking dish however looks tasty to you.
Then in a mixing bowl, combine eggs, milk and Bisquick. Pour that over your vegetable/meat/cheese/fungus assortment. Is it enough to cover? y/n
y: You’re golden. Put it in the oven covered and check in 30 minutes. You can uncover it at some point so the top browns. Pull it out when it’s not giggly in the middle anymore.
n: Do you have more eggs? If so, just combine those with a bit more milk and as you put it in the dish, jostle it about in hopes that it will combine consistently with the rest of your batter. For me, it’s usually a toss up because this is something I wake up wanting on the weekend when my last grocery shopping trip is a week behind me. So any time I remember to count how many eggs I have before I start making this is a major plus and I avoid the bleary, shamefaced trip to the corner market so I can finish cooking.
Anyway, eat it. It’s yummy.
Baked Banana Pie
I have invented a thing that I’m confident is actually a new thing in the world. And it’s delicious.
It is banana pie. Not like banana cream pie or a pie including bananas, but a baked pie that the main ingredient is bananas. And like a few of my favorite dessert recipe ideas, it came from a mostly forgotten dream.
It occurred to me that mashed banana is a lot like fresh pumpkin in texture and I wondered if anyone had ever tried to modify a pumpkin pie recipe to use bananas instead. So I turned to Google and was surprised to discover that no one seems to have done so.
I was compelled to try it. For science. |

Here’s the recipe.
UPDATE: I have since made this pie a few more times and I have some substitutions & shifts I think make this better.
|
Ingredients:
- 3.5 cups mashed banana
- One 14 oz. can of sweetened condensed milk
- Three eggs
- Vanilla
- Dark Rum
- Cinnamon
- Cloves
- Pie Crust*
*I’ll be honest, I most commonly just use these.
Preparation:
The nice thing about making banana pie instead of pumpkin is it is much quicker to whip up than a fresh pumpkin pie.
First you get your crusts sorted out, whatever that means for you. I’m mostly not an ambitious purist so I let refrigerated ones warm up and unroll them into my pie plates.
Next, preheat your oven to 425°.
Next up you mash up a bunch of bananas until you get to 3.5 cups. I’d recommend not using bananas that aren’t too ripe, since you get some sweetness from the sweetened condensed milk and you don’t want the pie to be too cloying. Put it in a bowl (unless you don’t have an immersion blender, but you really should get one. They’re incredibly useful, make clean-up effortless and are currently less than $30 on Amazon.)
Add the can of sweetened condensed milk, eggs and vanilla to the mixing bowl. Next add however much rum sounds good to you. (For flavorings like vanilla or alcohol, I basically never measure them. Eyeballed pours all the way.) Normally I’d use Myer’s because it’s the basic dark rum we usually have; for this recipe I was out, and used the somewhat fancier Kilo Kai we picked up a while back.
Regarding spices I do the same sort of “hey-that-looks-good” type of measurement for liquid flavorings. I was cautious with the spices for my first attempt, using just cinnamon and cloves, but I’m looking forward to tinkering in the future.
Pull out your immersion blender and process the mixing bowl contents so they’re silky smooth. If you don’t have an immersion blender, I would suggest using a food processor to smoothly blend together the banana and sweetened condensed milk, and using whatever mixing device you usually to to beat together the rest of the ingredients.

Put the filling in your pie plate and bake at 425° for around 25 minutes. Then turn your oven down to 350°. Bake for another 30-35 minutes (variable on your oven, altitude, etc.) until the pie has set up. A knife inserted should come out clean just like with pumpkin pie. Once it’s finished, pull it out, allow it to cool and chill in the fridge.
Serve cold topped with whipped cream just like pumpkin pie. It’s delicious.
My Chicken Cacciatore
Chicken cacciatore is one of my go-to delicious meal ideas. It’s simple and fast enough to make after work, although like a good spaghetti sauce, it gets even tastier if it has more time to stew.
Ingredients
- 4 chicken thighs and 4 legs
- 2 tablespoons minced garlic
- cremini mushrooms
- one yellow onion
- two green bell peppers
- two red bell peppers (optional, changes the flavor)
- 1.5 cups red wine*
- 1 cup chicken stock
- 28 oz. can crushed tomatoes
- 6 oz. can tomato paste
- dried oregano
- Basmati (or other favorite) rice to serve on
*We keep a box of red wine in the pantry specifically for cooking because a number of our favorite recipes include red wine. It stays sealed and fresher than an open bottle of wine. We’ve really enjoyed the results of Bota Box wines such as their shiraz.
Preparation
Dust the chicken with flour and brown in olive oil.

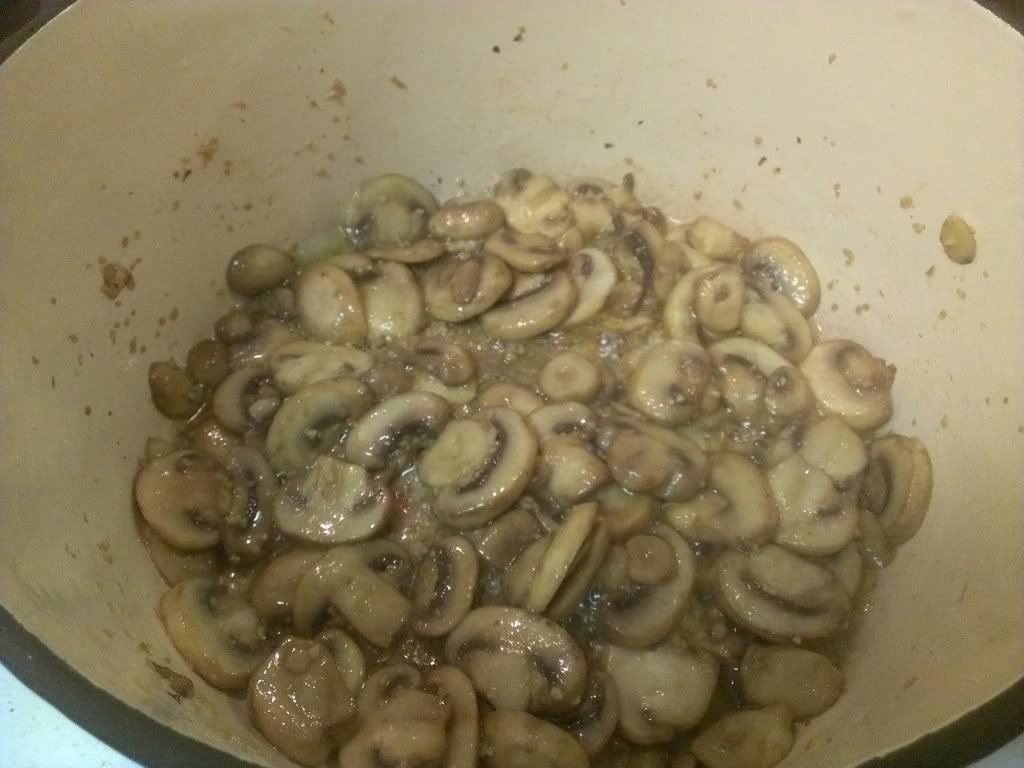
While the chicken is browning, you can save some time by getting the mushroom started in the enameled dutch oven. Slice the mushrooms and cook them in olive oil with the garlic.
Set the chicken aside and use the chicken pan to brown the onions.

Science Meat, Cheap Sous Vide Cooking
slignot’s editorial comment: I had prodded Thrack to actually finish this post, since I love it when he shows off his hidden awesome chef powers. But he’s let this one languish a long time, so forgive me, but I’m taking over.
Thrack cooks steaks in a cooler now. I thought he was crazy, because well, it sounds crazy to cook meat in a basic plastic cooler. But it’s a cheap way of replicating a fancy sounding French method of cooking vacuum sealed stuff in a water bath. Using a sous-vide method results in delicious, tender and evenly cooked steaks. There are lots of fancy ways of doing it, but if you don’t need to keep the temperature absolutely constant, this works just fine. It’s surprisingly easy, with the biggest investment being cooking time.
Just like pre-heating an oven, the first step is to get your water to the right temperature for the level of done-ness you’re aiming for. It will take some time to get the temperature exactly where you want it and stable. There are tricky ways of building water heaters to manage the temperature for you, but frankly, just putting in hot water from the tap and fiddling using boiled water from the stove gets the job done just fine. The first time you try it, you’ll want to figure out a good idea of what your heat loss rate is before you add the steaks, because you’ll need to add more hot water as you cook.
Once you get your water bath going, you work on the prepping the steaks for sealing. Like with lots of cooking, start out by patting the meat dry, then season however you like. We used tri-tips for our (pictured) first run.


The spice mix was a combination of garlic powder, smoked paprika, onion powder, nutmeg, cayenne pepper, ground sage and alder smoked salt. We stumbled across a bunch of fancy salts at a local Harmon’s a while back. Many of them smelled wonderful, the alder smoked salts blew all the others away. Seriously, this is amazing stuff.

After you’ve gotten your meat seasoned, slide them in sous-vide bags (which you can get a basic grocery store now). We put a pat of butter against each steak for added NOMs. Then you seal it up tight.

As you start placing the sealed packages in your water bath, don’t forget that adding cool meat (or veggies, etc. you can cook pretty much anything this way) will drop the temperature in the water bath, so you’ll need to carefully add fresh hot water to bring the temperature back up without overheating the outer edges of your steaks.

While you don’t need much fancy equipment, you really should consider getting an in-oven thermometer with a corded probe. They are exceedingly useful, and can easily be purchased for $20 or less. You lose less heat since you don’t need to open the cooler to check the temperature. It’s easier to keep the temperature stable, and cooks the meat more evenly because the hot water you add is less likely to brown the outermost parts of the steaks.
You will want to be careful about submerging the cable, however. We weren’t attentive enough keeping the sensor’s braided cable above the water level on our second meal, and destroyed that probe. We picked up another unit that has a solid cable shielding, but it’s still vulnerable where it joins the metal; we’re thinking of getting some heat shrink tubing try to seal it up a bit.

Cooking time depends on the size of the meat, but what you’re aiming for here isn’t just getting the meat safely cooked through. You’re essentially slow-cooking them so it breaks down connective tissue and yields a very tender steak that’s juicy and delicious. But instead of making meat stringy like a crock pot would, the water is sealed away, keeping the steaks like steak.
So while the meat may be done all the way through in an hour, it is so much more tasty if you cook them for three or more. The nice thing about this method is you can’t overcook anything. Because you’re bringing things to the temperature of what’s around them, once they get there, it doesn’t continue. Things don’t get dry or tough either. It takes time, but is honestly a simple method.
However long you decide to cook them for, if you’re on the rare/medium-rare side of things, the steaks look a little strange and undercooked as you pull them out.


When they come out, the steaks will be the same level of doneness all the way through, so instead of looking at a medium-rare steak where only the middle is pink, it’s consistently pink and tender. The last step before serving is to get an oiled pan nice and hot, and quickly sear the steaks.


The result is juicy, tender and amazing. And look at that pink interior! OM NOM NOM.

Crepes For Dinner

We’ve been terribly busy lately and blogging has suffered. I have a backlog of posts that are in progress that I simply haven’t had time to finish. Part of what kept us busy was a dinner with Thrack’s parents on Sunday when he made his incredible chicken cacciatore. It was so delicious and filling that we didn’t even prepare the crepes we’d planned.

We’re eating them for dinner tonight. There are two varieties: caramelized apples & pecans, and fresh strawberries. I have these signature wine and fruit reduction syrups that go with each. The white wine sauce was one I came up with in a dream; it’s made with pears and meyer’s lemons. The red sauce I’ve been making for ages and is fresh squeezed oranges and a clamshell of raspberries.

We’re having dessert for dinner. We’re responsible grownups. Shut up.


ZOMG Pumpkin Pie
I have some gourds in my oven right now.
 We’re contributing pumpkin pies to Thanksgiving this year, and that’s awesome. I love pumpkin pie; it’s always been one of my all time favorites. So when I decided to try making one from a real pumpkin after watching a Chow video showing how easy it is to get soft tender flesh from a pumpkin, I was excited but a little apprehensive. (I didn’t use his recipe, though, just got the initial inspiration to make a mostly from scratch pie.)
Turns out it really is simple to do, and ignore everything you’ve ever seen about cutting open and de-seeding the pumpkin beforehand because that’s annoying, messy and totally unnecessary. It turns out it’s so simple that I’m not even sure that it can be described as a “trick” in any way. Here’s what you do: wrap a whole pumpkin of your choice in foil and stick it in your oven on the lowest setting (200 degrees) for a minimum of 8 hours. You can put it in when you go to bed and scoop it out in the morning, no fuss.
It goes in like this.

And then when you pull it out later, it’s so soft and tender that the stem pulls right off and you can pop it right in half with a couple of big spoons. Everything is soft and tender, so you get the seeds out of your way and can scrape the flesh out. I’ve already made a couple pies so far this year (the first was a proof of concept pie), and I’m planning on making at least two more this week.


The one area where I fudge on my “from scratch” cred here is the crust. I have never, ever had any luck making homemade pie crust, no matter what my mom says about it being simple or whatever. I half believe that pie crust is a long-standing lie that parents and grandparents tell children to make them think it’s a good idea, when you should always just buy refrigerated crust and roll it out because it’s better than yours.
The photos here are from the last pie I made, since my mom has volunteered to make the crusts for me to put filling in tomorrow. I loved pumpkin pie before, but I confess that I’ve found that fresh pies made with pie pumpkins (can’t imagine what horror you’d serve up if you cooked jack-o-lanterns) are much better than the canned pies I’ve made before. It’s creamier in addition to being more flavorful, and I never really imagined it would be.

There and Back Again: Our Roadtrip to SoCal
This is very, very late and I’m sorry. But I can only say this: it’s over five thousand words. It includes pictures and cute videos of dogs at the beach. Feel free to skim as necessary. I’m putting it up anyway, because I don’t want to have the specter of this monster hanging over future postings.

My Parent's Birds, Mango and Bobber
My cousin got married during the first Weekend in May. And while we were trying to decide on plans to get down and back, we realized that while we had people lined up to watch our pets, my mom had no one to watch her dog. So after checking with my aunt & Grams, we decided to drive down to California with our Midna and my mom’s Bonnie Lass, while an aunt and uncle here in Salt Lake looked after our three collective conures.
Since Salt Lake to Yorba Linda is a long damned drive in one stretch, we opted for a stopover at a really reasonably priced casino in Mequite, NV, that not only accepted pets, but didn’t charge a big fee to have them stay in the room. Two 5 hour (ish) drives is much better than trying to drive straight through, especially when you consider having to pack up, feed/water, potty-break two dogs.

Midna and Bonnie on the Drive
I don’t think either dog had ever been on a long drive before, but my mom’s dog is a much more confident traveler. Midna it turns out is okay with maybe one long drive between houses she’s staying at, but refuses to eat or poop if you stop over through hotels and the like. She gets quite stressed, and is even pretty hesitant to drink water in the car. We’ve also discovered a whole new set of weird neuroses involving grass. Or rather the need for grass before a she can actually relieve herself. We tried and failed during potty breaks in the desert area behind the hotel room to get Midna to even pee, no matter how long we let her wander or sniff. We even went further away from the area immediately next to the hotel and let her off leash in case that was the problem. It wasn’t. Our solution was to make sure we stopped by a little park maybe half a mile away so she could do her business, but we now know our dog is crazy. Well, crazy in a whole new and exciting way, I guess.
The beginning of May seems to be a nice time to travel through the desert. With all the rain, we saw blossoms all over, including this very pretty white flower that is much bigger than most the small scrubbish stuff that blooms in the spring. I have no idea what it is, but they were everywhere on the trip down to California.

Mystery White Flower
We also learned a lesson about this particular hotel and the way that noise and footsteps are magnified through the ceiling above. While I’d definitely stay here as stopover again, I will definitely ask for an upper level room (Midna’s stair anxiety notwithstanding). We didn’t sleep especially well the first night we stayed at the hotel (on the SLC-SoCal leg of the trip) because the dogs took a long time getting used to unexpected noises above them. Lots and lots of growling and barking, mainly on the part of my mom’s beagle. It was a little frustrating and I was a bit irritable the next day.

Bonnie in the Park in Mesquite
May I just take a moment to complain about California drivers? Now people tend to rag on the drivers wherever they live (while assuming they are one of the few good ones) and that’s more or less just human nature. But I swear, driving in California makes me 10,000 times as anxious and uncomfortable as driving anywhere else I have because they don’t actually behave predictably. After years of spending childhood summers there, and now having driven there as an adult, I have come to one unifying idea about drivers in California: they do what seems most expedient for them personally without taking anyone else around them into considerations. It makes for some stress-inducing driving. It comes into play pretty soon after crossing the border, from what I’ve seen, so I believe there is some sort of bizarre social dynamic at work in training drivers within the state of California that produces scary fucking car operators.


